

Recently, I had in-depth discussions with some of my UI designer colleagues regarding UI design in Flutter. They raised a series of questions about the feasibility of using Flutter for design, which piqued my curiosity. I conducted some experiments and obtained valuable results.
These experiments allowed me to gain a deeper understanding of the UI design features of Flutter and provided valuable insights and revelations. In this article, I will share these findings, hoping that they will be helpful to you and assist you in better programming within the Flutter domain.
Whether you are a novice Flutter developer or an experienced designer, this article will provide important considerations to keep in mind when designing UI in Flutter. Let's delve into this exciting and promising UI design framework together!
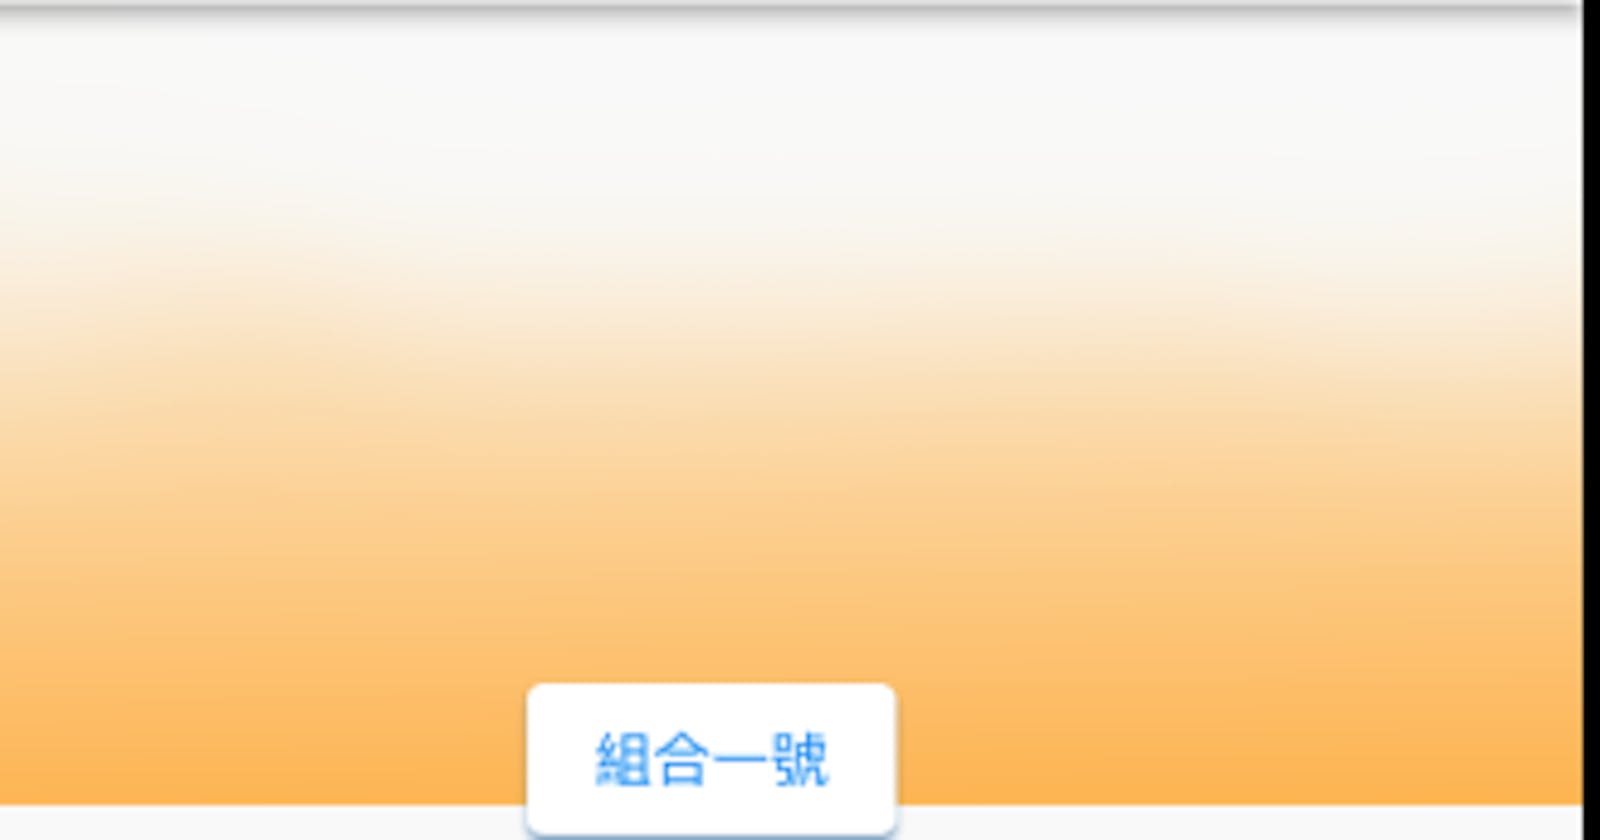
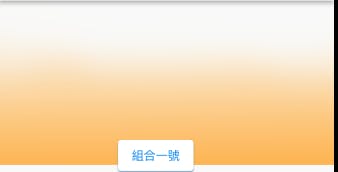
Can the image have its colors changed?
Container(
    child: Image.network(
    "https://www.seekpng.com/png/full/2-22933_gradient-overlay-transparent-to-black-gradient-png.png",
   color: Colors.orange
     ),
),
The above code demonstrates how to use Container and Image.network in Flutter to load an image from a network connection and change its color. In this example, we use orange as the value for the image's color property. This means that the image will be displayed with an orange overlay, thereby altering its visual appearance.
This approach is very convenient as it allows you to dynamically change the color of the image, making it better suited to the application's theme or specific design requirements. You can adjust the value of the color property as needed, using different colors to achieve different color effects.

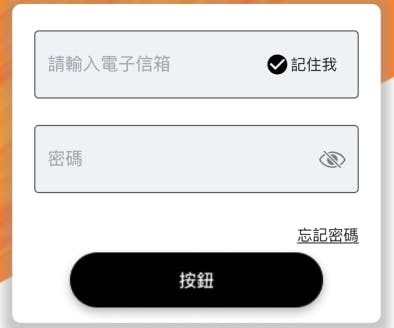
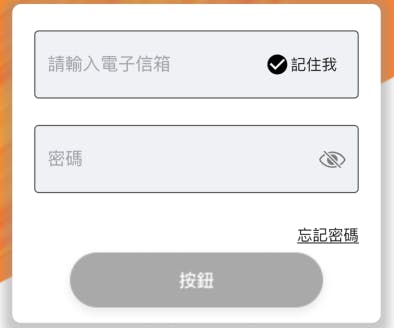
Display different states of the button through altering the transparency of the images.
Opacity(
                        opacity: buttonState ? 1 : 0.1,
                          child: Image.asset("images/BLK.png",)
                      )
The above code demonstrates how to create different visual effects for button states by altering the transparency of images in Flutter. In this example, we use the Opacity widget and set the opacity based on the button's state (buttonState). When the button state is true, the opacity is set to 1, making the image fully visible. When the button state is false, the opacity is set to 0.1, resulting in a lower level of transparency for the image.
This technique allows for easy creation of various button states, such as the pressed state or the disabled state of a button. By modifying the transparency of the image.
Feasibility of Blur Effect
Partial Blur Effect
Stack(
children: [
Align(
alignment: Alignment.topCenter,
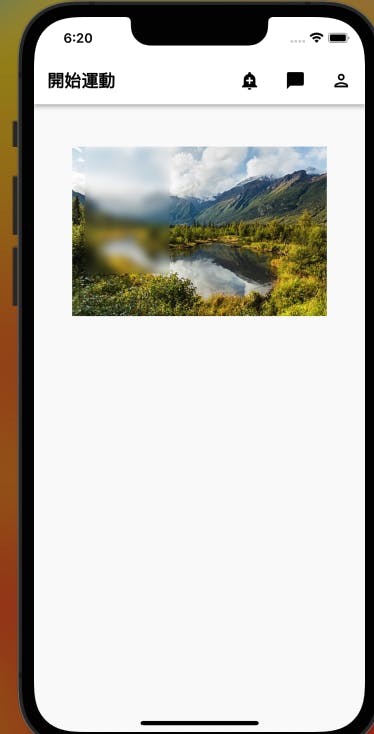
child: Image.network("https://upload.wikimedia.org/wikipedia/commons/thumb/8/81/Parque_Eagle_River%2C_Anchorage%2C_Alaska%2C_Estados_Unidos%2C_2017-09-01%2C_DD_02.jpg/440px-Parque_Eagle_River%2C_Anchorage%2C_Alaska%2C_Estados_Unidos%2C_2017-09-01%2C_DD_02.jpg",
width: 300, height: 300,),
),
Positioned(
left: 60,
top: 50,
height: 150,
width: 100,
child: ClipRect(
child: BackdropFilter(
filter: ImageFilter.blur(sigmaY: 5, sigmaX: 5),
child: Container(
alignment: Alignment.center,
color: Colors.yellow.withOpacity(0),
child: Text(''),
),
),
),
)
],
)
The above code example demonstrates how to create different visual effects using the blur effect in Flutter. The outer layer utilizes the Stack and Align widgets to place a network image at the top center of the page, with specified width and height. Next, the Positioned widget is used to create a container with a blur effect. This container utilizes the ClipRect and BackdropFilter widgets and sets the level of blur using sigmaY and sigmaX. Finally, this container is positioned within the Stack, resulting in a partial blur effect.
Full page blur effect
Align(
            alignment: Alignment.topCenter,
            child:  Image.network("https://upload.wikimedia.org/wikipedia/commons/thumb/8/81/Parque_Eagle_River%2C_Anchorage%2C_Alaska%2C_Estados_Unidos%2C_2017-09-01%2C_DD_02.jpg/440px-Parque_Eagle_River%2C_Anchorage%2C_Alaska%2C_Estados_Unidos%2C_2017-09-01%2C_DD_02.jpg",
                       width: 300, height: 300,),
          ),
          Positioned(
            // left: 60,
            // top: 50,
            // height: 150,
            // width: 100,
            child: ClipRect(
              child: BackdropFilter(
                filter: ImageFilter.blur(sigmaY: 5, sigmaX: 5),
                child: Container(
                  alignment: Alignment.center,
                  color: Colors.yellow.withOpacity(0),
                  child: Text(''),
                ),
              ),
            ),
          )
The second section of the code omits specific positioning and sizing settings and only retains the container with the blur effect. This container also utilizes the ClipRect and BackdropFilter widgets and sets the level of blur using sigmaY and sigmaX. This allows for creating a global blur effect throughout the entire page.
With these code snippets, you can easily add blur effects in Flutter, bringing visual depth and an artistic touch to your applications. The blur effect can be used to highlight specific areas, create visual focal points, or add a gentle ambiance to the interface, enhancing the appearance and experience of your application.

In these code examples, we delved into the methods of creating captivating visual effects in Flutter. By learning how to change image colors, alter opacity, and apply blur effects, we can bring new possibilities to the UI design of our applications.
We hope these discoveries inspire your creativity and bring new possibilities to your Flutter projects. Through continuous learning and exploration, we can constantly improve our UI design skills and create outstanding and appealing applications.